Complete Guide to MCP Server Setup in 2025: Desktop Extensions & Manual Configuration
Introduction
Setting up Model Context Protocol (MCP) servers has become significantly easier in 2025 with the introduction of Desktop Extensions for Claude Desktop. This comprehensive guide covers both the new one-click Desktop Extensions method and the traditional manual configuration approach, ensuring you can choose the best setup method for your needs.
MCP enables Claude to securely connect to external tools, databases, and services, dramatically expanding its capabilities. Whether you're a developer looking to integrate custom APIs or a power user wanting to connect productivity tools, this guide will get you started quickly.
Prerequisites
Before you begin, ensure you have:
System Requirements
- Claude Desktop (latest version with Desktop Extensions support)
- Operating System: Windows 10+, macOS 10.15+, or Linux Ubuntu 18.04+
- Node.js 18.0.0 or higher (for most MCP servers)
- Python 3.8+ (for Python-based MCP servers)
- Administrator privileges on your system
Verification Steps
# Check Node.js version
node --version
# Should output: v18.0.0 or higher

# Check npm version
npm --version
# Should output: 8.0.0 or higher

# Check Python version (if needed)
python --version
# Should output: Python 3.8.0 or higher
Method 1: Desktop Extensions (Recommended for 2025)
Desktop Extensions represent the future of MCP server management, providing a streamlined installation experience similar to browser extensions.
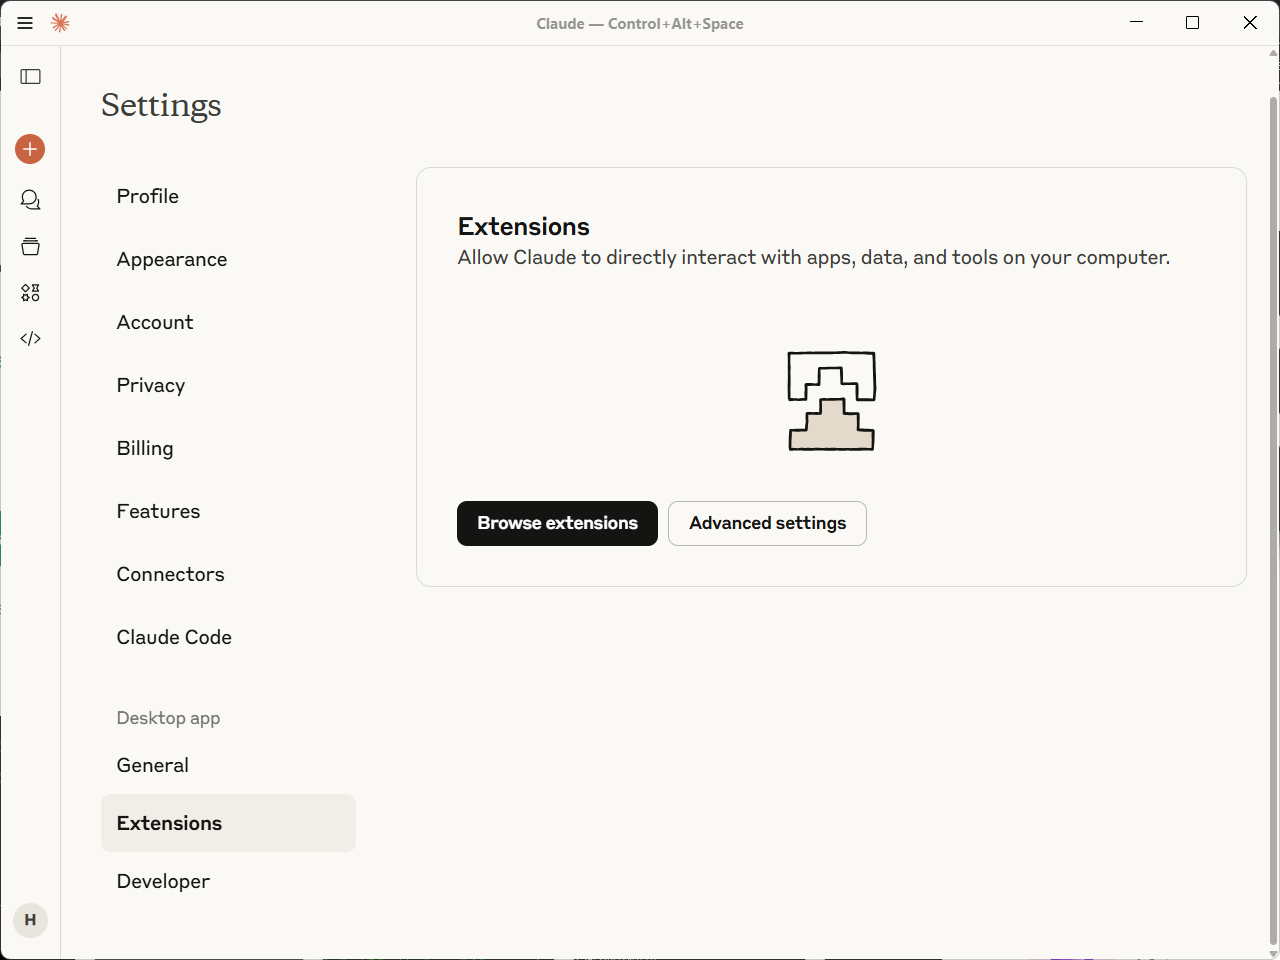
Step 1: Access Desktop Extensions
- Open Claude Desktop and ensure you're signed in
- Navigate to Settings (gear icon in the lower left)
- Select the Extensions tab (new in 2025)
- Verify Extensions are enabled in your region
Step 2: Browse Available Extensions
The Extensions marketplace includes curated MCP servers across multiple categories:
Productivity Extensions
- GitHub Integration - Repository access and code analysis
- Google Drive - File management and document access
- Slack - Team communication and workflow automation
- Notion - Database queries and content management
Development Extensions
- PostgreSQL - Database queries and schema management
- MongoDB - NoSQL database operations
- Docker - Container management and deployment
- AWS CLI - Cloud resource management
Data Analysis Extensions
- Pandas Server - Data manipulation and analysis
- Jupyter - Notebook execution and visualization
- SQLite - Local database management
- CSV Tools - Spreadsheet processing
Step 3: Install Your First Extension
Let's install the GitHub extension as an example:
- Search for "GitHub" in the Extensions marketplace
- Click "Install" on the GitHub MCP Extension
- Review permissions that the extension requests:
- Repository read access
- Issue and PR management
- Code search capabilities
- Click "Authorize" to proceed with installation
Step 4: Configure Extension Settings
After installation, configure the GitHub extension:
- Click "Configure" next to the installed extension
- Authenticate with GitHub using OAuth 2.0 flow
- Grant necessary permissions for repository access
- Test the connection using the built-in validation tool
// Extension configuration is automatically managed
{
  "extensionId": "github-mcp",
  "version": "1.2.0",
  "status": "active",
  "lastAuthenticated": "2025-08-16T10:30:00Z",
  "permissions": [
    "repo:read",
    "issues:write",
    "pull_requests:write"
  ]
}
Step 5: Verify Extension Functionality
Test your GitHub extension:
- Start a new conversation in Claude Desktop
- Ask Claude to list your repositories:
"Can you show me my GitHub repositories?" - Verify the response includes your actual repositories
- Test additional features like creating issues or searching code
Benefits of Desktop Extensions
- ✅ One-click installation - No manual configuration needed
- ✅ Automatic updates - Extensions update automatically
- ✅ Security managed - OAuth flows handled securely
- ✅ Error handling - Built-in troubleshooting and diagnostics
- ✅ Enterprise support - Admin policies and group management
Method 2: Manual Configuration (Traditional Method)
For custom MCP servers or advanced use cases, manual configuration provides full control over server setup and configuration.
Step 1: Locate Configuration File
Find your Claude Desktop configuration file:
Windows:
%APPDATA%\Claude\claude_desktop_config.json
macOS:
~/Library/Application Support/Claude/claude_desktop_config.json
Linux:
~/.config/Claude/claude_desktop_config.json
Step 2: Create or Edit Configuration
If the file doesn't exist, create it with basic structure:
{
  "mcpServers": {},
  "globalShortcut": "CommandOrControl+Shift+Space"
}
Step 3: Add Your First MCP Server
Let's add a filesystem server for file management:
{
  "mcpServers": {
    "filesystem": {
      "command": "npx",
      "args": [
        "-y",
        "@modelcontextprotocol/server-filesystem",
        "/Users/yourusername/Documents"
      ],
      "env": {
        "NODE_ENV": "production"
      }
    }
  }
}
Configuration Breakdown:
filesystem- Unique server identifiercommand- Executable to run the serverargs- Command-line arguments including the directory pathenv- Environment variables for the server
Step 4: Add Database Integration
Add a PostgreSQL server for database access:
{
  "mcpServers": {
    "filesystem": {
      "command": "npx",
      "args": [
        "-y",
        "@modelcontextprotocol/server-filesystem",
        "/Users/yourusername/Documents"
      ]
    },
    "postgres": {
      "command": "uvx",
      "args": ["mcp-server-postgres"],
      "env": {
        "POSTGRES_CONNECTION_STRING": "postgresql://username:password@localhost:5432/database_name"
      }
    }
  }
}
Security Note: For production systems, use environment variables or secure credential management instead of hardcoding passwords.
Step 5: Add API Integration
Configure a custom API server:
{
  "mcpServers": {
    "filesystem": {
      "command": "npx",
      "args": [
        "-y",
        "@modelcontextprotocol/server-filesystem",
        "/Users/yourusername/Documents"
      ]
    },
    "postgres": {
      "command": "uvx",
      "args": ["mcp-server-postgres"],
      "env": {
        "POSTGRES_CONNECTION_STRING": "postgresql://username:password@localhost:5432/database_name"
      }
    },
    "github": {
      "command": "npx",
      "args": [
        "-y",
        "@modelcontextprotocol/server-github"
      ],
      "env": {
        "GITHUB_PERSONAL_ACCESS_TOKEN": "ghp_your_github_token_here"
      }
    }
  }
}
Step 6: Validate Configuration
Before restarting Claude Desktop, validate your JSON:
# Using Node.js to validate JSON
node -e "console.log(JSON.parse(require('fs').readFileSync('claude_desktop_config.json', 'utf8')))"

# Or use online JSON validator: https://jsonlint.com/
Step 7: Restart and Test
- Save the configuration file
- Completely quit Claude Desktop (not just minimize)
- Restart Claude Desktop
- Look for server indicators in the interface
- Test each server with specific requests
Advanced Configuration Patterns
Environment Variable Management
For secure credential handling:
{
  "mcpServers": {
    "secure-api": {
      "command": "node",
      "args": ["path/to/your/server.js"],
      "env": {
        "API_KEY": "${SECURE_API_KEY}",
        "DATABASE_URL": "${DATABASE_CONNECTION_STRING}",
        "DEBUG": "false"
      }
    }
  }
}
Set environment variables in your system:
# Windows (Command Prompt)
set SECURE_API_KEY=your_api_key_here
set DATABASE_CONNECTION_STRING=your_connection_string

# Windows (PowerShell)
$env:SECURE_API_KEY="your_api_key_here"
$env:DATABASE_CONNECTION_STRING="your_connection_string"

# macOS/Linux
export SECURE_API_KEY="your_api_key_here"
export DATABASE_CONNECTION_STRING="your_connection_string"
Multiple Transport Types
Configure both STDIO and SSE transports:
{
  "mcpServers": {
    "local-server": {
      "command": "node",
      "args": ["local-server.js", "--transport", "stdio"]
    },
    "remote-server": {
      "url": "https://your-mcp-server.herokuapp.com/sse",
      "headers": {
        "Authorization": "Bearer your-token-here"
      }
    }
  }
}
Development vs Production Configurations
Create environment-specific configurations:
{
  "mcpServers": {
    "api-server": {
      "command": "node",
      "args": ["server.js"],
      "env": {
        "NODE_ENV": "development",
        "API_BASE_URL": "https://api-staging.example.com",
        "LOG_LEVEL": "debug"
      }
    }
  }
}
Popular MCP Server Configurations
1. Comprehensive Development Setup
{
  "mcpServers": {
    "filesystem": {
      "command": "npx",
      "args": [
        "-y",
        "@modelcontextprotocol/server-filesystem",
        "/Users/developer/projects"
      ]
    },
    "github": {
      "command": "npx",
      "args": ["-y", "@modelcontextprotocol/server-github"],
      "env": {
        "GITHUB_PERSONAL_ACCESS_TOKEN": "ghp_your_token"
      }
    },
    "postgres": {
      "command": "uvx",
      "args": ["mcp-server-postgres"],
      "env": {
        "POSTGRES_CONNECTION_STRING": "postgresql://dev:password@localhost:5432/devdb"
      }
    },
    "docker": {
      "command": "npx",
      "args": ["-y", "@modelcontextprotocol/server-docker"],
      "env": {
        "DOCKER_HOST": "unix:///var/run/docker.sock"
      }
    }
  }
}
2. Data Analysis Workflow
{
  "mcpServers": {
    "sqlite": {
      "command": "uvx",
      "args": ["mcp-server-sqlite", "--db-path", "/path/to/database.db"]
    },
    "pandas": {
      "command": "uvx",
      "args": ["mcp-server-pandas"]
    },
    "google-sheets": {
      "command": "npx",
      "args": ["-y", "@modelcontextprotocol/server-google-sheets"],
      "env": {
        "GOOGLE_SHEETS_CREDENTIALS": "/path/to/service-account.json"
      }
    }
  }
}
3. Content Management Setup
{
  "mcpServers": {
    "notion": {
      "command": "npx",
      "args": ["-y", "@modelcontextprotocol/server-notion"],
      "env": {
        "NOTION_API_KEY": "secret_your_notion_key"
      }
    },
    "google-drive": {
      "command": "npx",
      "args": ["-y", "@modelcontextprotocol/server-gdrive"],
      "env": {
        "GOOGLE_DRIVE_CREDENTIALS": "/path/to/oauth-credentials.json"
      }
    },
    "slack": {
      "command": "npx",
      "args": ["-y", "@modelcontextprotocol/server-slack"],
      "env": {
        "SLACK_BOT_TOKEN": "xoxb-your-bot-token",
        "SLACK_USER_TOKEN": "xoxp-your-user-token"
      }
    }
  }
}
Troubleshooting Common Issues
Server Not Starting
Symptoms: No server indicators appear in Claude Desktop
Solutions:
- Check JSON syntax with validator
- Verify file paths are correct and accessible
- Test command manually in terminal
- Check Node.js/Python versions meet requirements
- Review Claude Desktop logs for error messages
Authentication Failures
Symptoms: Server starts but API calls fail
Solutions:
- Verify API tokens are valid and not expired
- Check token permissions have required scopes
- Test authentication outside of MCP context
- Review rate limiting and quota restrictions
Permission Errors
Symptoms: "Access denied" or "Permission denied" errors
Solutions:
- Run Claude Desktop as administrator (if needed)
- Check file system permissions for specified paths
- Verify network access for remote servers
- Review firewall settings for blocked connections
Performance Issues
Symptoms: Slow responses or timeouts
Solutions:
- Optimize server configuration for your hardware
- Implement connection pooling for database servers
- Use local caching for frequently accessed data
- Monitor resource usage during operations
Security Best Practices
Credential Management
- Never commit credentials to version control
- Use environment variables for sensitive data
- Implement token rotation for long-lived tokens
- Monitor access logs for suspicious activity
Network Security
- Use HTTPS for all remote connections
- Implement proper CORS for web-based servers
- Validate input at all server endpoints
- Use rate limiting to prevent abuse
File System Access
- Limit directory access to necessary paths only
- Implement file type filtering for uploads
- Use sandboxed environments for untrusted code
- Regular security audits of accessible files
Maintenance and Updates
Regular Maintenance Tasks
- Update MCP servers monthly or as releases are available
- Review and rotate API tokens quarterly
- Monitor server logs for errors and performance issues
- Test server functionality after Claude Desktop updates
Update Commands
# Update npm-based servers
npx @modelcontextprotocol/server-filesystem@latest

# Update Python-based servers
uvx --upgrade mcp-server-postgres

# Check for outdated packages
npm outdated -g
Backup Configuration
# Backup configuration file
cp ~/Library/Application\ Support/Claude/claude_desktop_config.json \
   ~/Library/Application\ Support/Claude/claude_desktop_config.json.backup

# Version control for configurations
git add claude_desktop_config.json
git commit -m "Update MCP server configuration"
Performance Optimization
Server Configuration Tuning
{
  "mcpServers": {
    "optimized-server": {
      "command": "node",
      "args": [
        "server.js",
        "--max-connections=10",
        "--timeout=30000",
        "--cache-size=100MB"
      ],
      "env": {
        "NODE_ENV": "production",
        "UV_THREADPOOL_SIZE": "16"
      }
    }
  }
}
Memory Management
Monitor and optimize memory usage:
// Server-side memory monitoring
process.on('memoryUsage', () => {
  const usage = process.memoryUsage()
  console.log(`Memory usage: ${Math.round(usage.heapUsed / 1024 / 1024)} MB`)
})

// Implement graceful memory cleanup
process.on('SIGTERM', () => {
  // Clean up connections and caches
  cleanup()
  process.exit(0)
})
Next Steps
After completing this setup guide:
- Explore Advanced Features - Learn about custom MCP server development
- Join the Community - Connect with other MCP developers and users
- Contribute - Help improve existing servers or create new ones
- Scale Up - Implement enterprise-grade MCP server deployments
Recommended Reading
- MCP Authentication Troubleshooting Guide - Solve common auth issues
- Advanced MCP Server Patterns - Learn professional development practices
- MCP Security Best Practices - Implement production security
- Custom MCP Server Development - Build your own servers
Resources and Support
Official Documentation
Community Resources
Getting Help
If you encounter issues not covered in this guide:
- Check the troubleshooting section above
- Search existing issues on GitHub
- Ask in the community Discord for real-time help
- File a detailed issue with reproduction steps
This guide is updated regularly based on community feedback and new MCP developments. Last updated: August 16, 2025.